Milk is not technically a part of my CSA, but I learned that one of the few raw dairies in the Front Range makes it products available at the 63rd Street Farm on Thursdays. The veggies in the CSA this week inspired me to do some Indian style cooking, and so I set out in search of some proper milk to make fresh Indian cheese, called paneer. Next week I’ll be giving you the recipe for the full dinner of which the paneer is a part, but for now, let’s learn the basics of making paneer.
It’s actually pretty easy. Some cheeses take a lot of input and ingredients, but paneer takes just the following:
1/4 cups water
1/2 gal (8 cups) whole milk (preferably local and raw)
2 cups cultured buttermilk
OR
3-6 Tbsp lemon juice or as needed (I prefer buttermilk because I think it yields creamier results)
Pour the water into a big old pasta pot- you’ll need plenty of room- and crank that heat up to high. Once the water has reached boiling, turn the heat down to medium, then go ahead and pour that beautiful raw milk in there. If you are, say, Molly McCahan, you will probably need to take a perfunctory sip of the milk, just to make sure it tastes right. It does. It is delicious.
Cook the milk on medium for about 15 minutes, letting it slowly build up to boiling and stirring occasionally to prevent scorching. Once it has reached the boiling point (you can tell because it should be pretty frothy on top) remove from heat. Slowly pour in one cup of the cultured buttermilk while stirring the milk. Keep stirring. If you don’t begin to see the separation of the milk solids from the whey (aka, curdling) at this point, go ahead and slowly add the second cup of buttermilk. If using lemon juice, add the juice one tablespoon at a time until you see the curdling. You should definitely see the curdling happening now. Stir for about another minute.
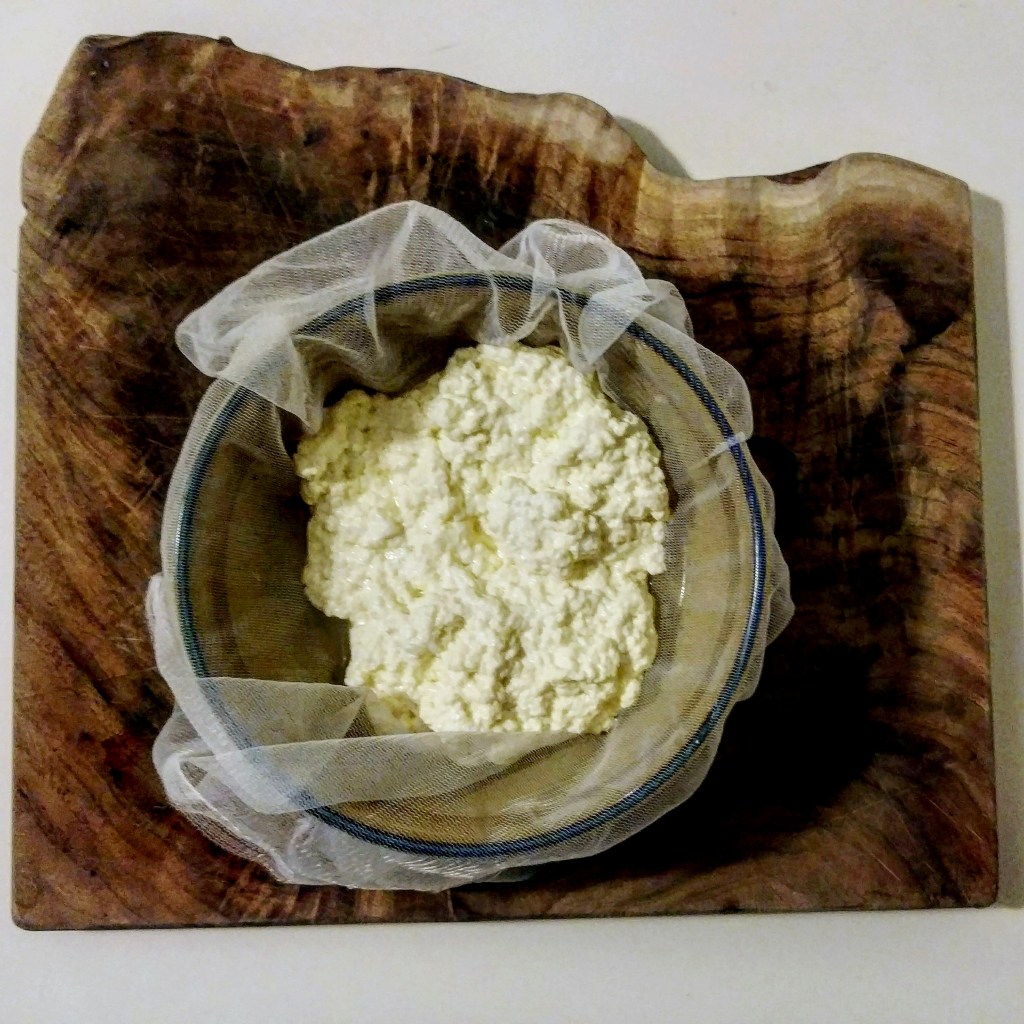
Find some cheesecloth, a clean piece of cotton fabric, or in my case, a reusable vegetable bag, and place it over a large bowl. Gently either ladle the cheese curds onto your straining cloth with a spoon or just pour the whole puppy in, then lift the cloth out of the bowl. The whey will remain in the bowl, and you will have the almost finished paneer in your hands. I gently twist the bag closed, then place it on top of an overturned plate in the sink. Play another plate on top of the paneer and weight it down. I use a pot filled with water. Allow the pot to press the cheese for no longer than five minutes.
Save the whey in a jar and place in the fridge or freezer. Remove the paneer from the cloth and either use fresh or refrigerate for up to four days. I will be using both the paneer and the whey in next week’s super special spring curry, so be sure to tune in next week!
Localism rating: (in the case of buttermilk) 75% local
The buttermilk I used was unfortunately not local. If I wanted to use 100% local ingredients, I would have to ferment some local, raw cream, shake it into butter, then use the leftover buttermilk to make the cheese. Alternatively, I could just ferment some of the milk and use it straight up. The fermentation process acidifies the milk, and the presence of acid in hot milk (either from fermentation or lemon juice) separates the milk fat solids from the proteins and water.
Voila! Cheese.
Cheers,
Molly

One response to “CSA Friday 4: Paneer”
[…] 1 paneer patty (from last week’s entry- HERE) […]
LikeLike